Tamlyn Martin is an artist, mother, stylist, curator, lecturer and a fabulous cook. TM was kind enough to share her tips on getting prepared for a shoot.
click on the hyperlinks to see other blog entries on TM •
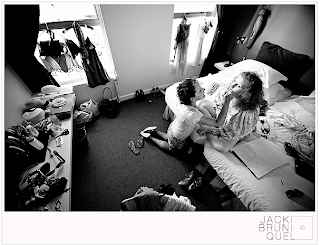 |
| © Jacki Bruniquel |
The image above is a screenshot from photographer Jacki Bruniquel's blog [scroll down to see my blog list gadjet on the right]. Tamlyn was the stylist, Jacki was the photographer and they were assisted by Natasha Schoeman. Please read about the shoot on Jacki's blog.
•
Below is Tamlyn's list on how to plan a shoot_ it will be posted in 3 parts.
part 1: PREPARATION
- buy or make a book that has blank pages_ create a Reflective Journal [RJ]
- collect inspirational images remember to look for design styles, fashion trends, poses,colors, statements, types of locations.... paste them into a book write what you really love about them.
- collect garments and props that reflect the images in the book take things on apro and try them on at home with pieces you have in your cupboard
- experiment with make up and hair...TAKE PICS.. paste into your book... use for blog entries _ask friends to comment on what they think is cool
- you could even take the snap shots and inspiration images and paste them onto canvases... write onto them make the process exciting and hang the artworks up.
- hunt down cool locations, take pics, find the contacts of the people in charge, paste into your book.
- start looking for themes that tie into your songs... words from lyrics... do research on artists/ photographers/ writers/ designers working with these themes... what visual elements do you share... print this out and paste it into your book, post them on your blog.. write about them
- visualize the coming together of all you inspiration
- practice getting into the mood... rehearse actually doing it as you would for a performance.
- Remember that this book, your RJ, can be used for years to come to explain ideas, remind you of all-sorts of inspiration and to give you a personal point of reference, at a given time and place.
- after shoots always add the final images as this will reinforce the powerful materialization of the ideas... and help to build your own look.
When you are ready to do the shoot, give yourself at least 1 month to plan and prepare...
•
click here for part 2
[still to be constructed]
☕


